10 Essential Tips for Northern Lights Photography in Tromso
Master northern lights photography in Tromso with our guide to the best locations, camera settings, and essential gear for capturing the Aurora Borealis.
On this page
10 Essential Tips for Northern Lights Photography in Tromso
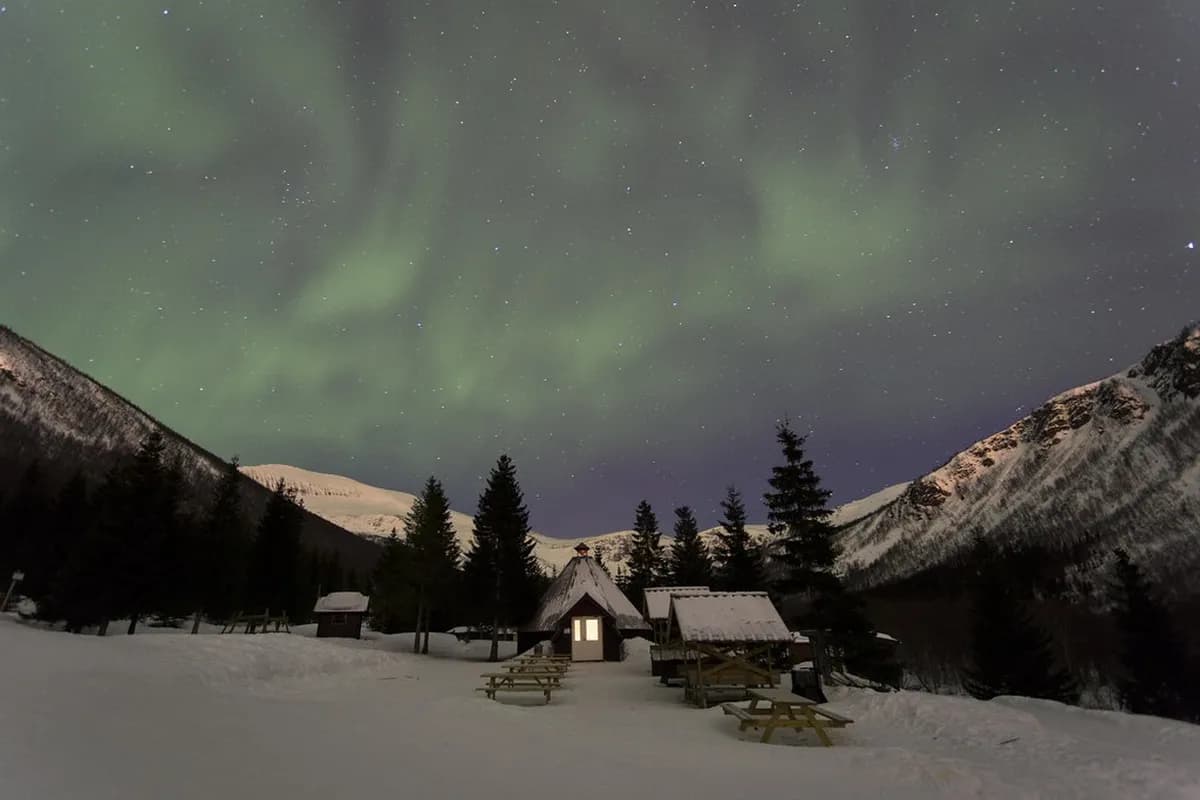
Capturing the green glow of the dancing lights requires more than just luck. Tromsø serves as the ultimate hub for photographers seeking the elusive Aurora Borealis. This city offers a unique blend of accessible wilderness and modern comfort. You will find that preparation is the key to successful northern lights Tromso photography.
The Arctic environment presents challenges that can drain batteries and freeze equipment in minutes. Understanding the technical side of your camera helps you react quickly when the sky explodes with color. Local weather patterns also play a massive role in finding clear patches of sky. This guide covers everything from technical settings to the best dark sky spots, organized around the ten decisions that actually determine whether you come home with memorable images.
Why Tromsø is the Premier Base for Aurora Photography
Tromsø sits directly within the Auroral Oval, the band of geomagnetic activity where aurora displays are most frequent and intense. This position means visible aurora occurs on roughly 70–80% of clear nights during the season, not just during strong solar storms. The city is surrounded by varied microclimates that give you real options when coastal clouds roll in. You can drive inland to find clear skies even when the city center is overcast.
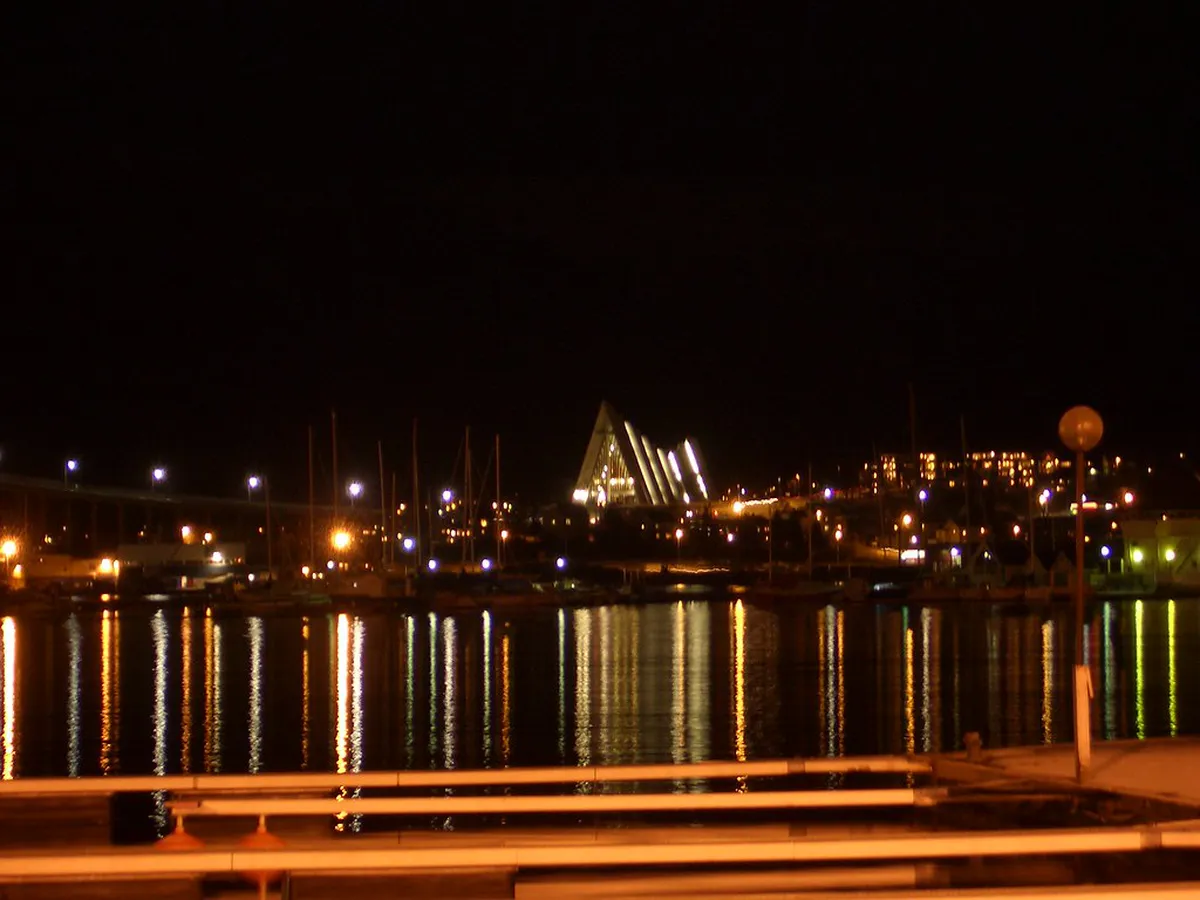
Infrastructure in the region supports late-night excursions with well-maintained roads and reliable mobile signal across most routes. Many photographers base themselves in the city and reach remote fjords within 30–45 minutes. The availability of expert-led northern lights tours Tromso adds another layer of security for beginners who are unfamiliar with winter driving. Local guides share real-time cloud movement data across the surrounding islands, a genuine edge over going solo.
Solar Cycle 25 peaked around 2025 and remains highly active into 2026, producing frequent KP 4–6 events visible even from Bortle 4 locations near the city. UIT Arctic University researchers have documented this as one of the best windows in over a decade to photograph the aurora. Plan your shoot for a night with no moon or a thin crescent — a full moon washes out faint curtain detail but can illuminate snow-covered foregrounds beautifully if the display is strong.
Best Time to See and Photograph the Northern Lights
The photography season runs from late September through early April, giving you roughly six and a half months of usable darkness. The equinox months of September–October and March–April typically see elevated geomagnetic activity due to the Russell-McPherron effect, which tilts Earth's magnetic field into a configuration that funnels more solar wind into the polar regions. Check the best time northern lights Tromso guide for month-by-month weather statistics.
Peak hours for display activity run from approximately 21:00 to 02:00 local time, with a secondary statistical spike around 18:00. Plan to be at your chosen location by 20:30 at the latest so you have time to set up before the prime window opens. During polar night — roughly late November to mid-January — you can begin shooting as early as 15:00 when the sky is already fully dark, which nearly doubles your shooting window compared to October or April.
Clear sky probability matters as much as solar activity. Tromsø's coastal position means frequent cloud cover, but the surrounding fjords and inland valleys often have their own microweather. Skibotn, 90 km southeast, has a well-documented "dry hole" effect and stays clear when the entire coast is under cloud. Knowing this before you go can turn a near-miss into a successful shoot night.
Essential Camera Gear for Arctic Night Photography
A full-frame or APS-C camera body with manual mode is the non-negotiable starting point. Full-frame sensors (Sony A7 series, Nikon Z6/Z7, Canon EOS R5/R6) perform noticeably better at ISO 3200 and above, producing cleaner images with less chroma noise. APS-C bodies such as the Sony A6700 or Fujifilm X-T5 work well for moderate displays but start to show grain in the fine aurora curtain detail at ISO 3200+.
The most important investment after the body is a wide-angle lens: 14–24 mm at f/2.8 or faster. A lens like the Sigma 14mm f/1.8 Art or the Sony FE 14mm f/1.8 GM lets you shoot at ISO 1600 instead of 3200 for equal exposure, which is a meaningful noise reduction. A sturdy tripod rated for at least 3–5 kg is the third pillar. Carbon fibre models (€150–300) outperform aluminium in sustained cold, and plastic head components can snap below –15°C — check the cold-weather rating before you buy.
- Cold depletes lithium-ion batteries 40–70% faster than in temperate conditions. Carry at least three full charges and rotate warm spares from your inner jacket pocket every 30–45 minutes.
- A lens heater strip (€15–30) prevents dew and frost from forming on the front element during humid or near-freezing sessions.
- A remote shutter release or 2-second self-timer eliminates camera shake from button press — one of the most overlooked causes of soft images.
- Fast memory cards (UHS-I or UHS-II, 64 GB+) prevent buffer delays when shooting RAW bursts during a rapidly-moving curtain display.
- A red-filtered headlamp preserves your night vision, which takes 20–30 minutes to recover after exposure to white light. Never point a white flashlight at another photographer's setup.
Battery performance degrades sharply below –15°C. A lithium-ion battery rated for 500 shots in moderate conditions may deliver only 150–200 in sustained sub-zero temperatures. Keep spares in a chest pocket against your body heat to maintain function.
Recommended Camera Settings for Aurora
Set your camera to Manual mode and shoot RAW. Begin with these starting values and adjust from there: ISO 1600–3200, aperture at the lens maximum (f/2.8 or wider), shutter speed 10–20 seconds. Aperture is your single biggest variable — every full stop wider (f/2.8 to f/2.0 to f/1.4) halves the ISO you need to reach the same exposure, directly reducing noise.
Shutter speed requires a balance between gathering enough light and avoiding star trails. The 500 Rule is the practical shortcut: divide 500 by your focal length to get the maximum seconds before stars begin to trail. At 14 mm that gives you 35 seconds — though 15–20 seconds produces sharper pinpoint stars on most sensors. For scientific background on how auroras emit light, understanding the physics helps refine your exposure strategy. At 24 mm the limit drops to about 21 seconds, and at 35 mm to 14 seconds. Fast-moving aurora curtains during KP 4–5 events benefit from even shorter 6–10 second exposures that freeze the fine structure instead of blending it into a smear.
Manual focus to true infinity is essential because autofocus cannot acquire a target in the dark. Use live view, zoom in to 10x magnification on a bright star, and turn the focus ring until the star is a sharp point. Once set, apply a strip of gaffer tape across the focus ring to prevent accidental shifts when you swap lenses or bump the camera in the dark. Set white balance to a fixed 3200–4000 K rather than Auto, which shifts between frames and makes batch editing harder.
| Setting | Beginner Start | Intermediate | Advanced / Fast Display |
|---|---|---|---|
| Shutter speed | 15–20 sec | 10–15 sec | 6–10 sec |
| Aperture | f/2.8 | f/2.0–f/2.8 | f/1.4–f/2.0 |
| ISO | 3200 | 1600–2500 | 800–2000 |
| Focus | Manual infinity | Manual infinity | Manual infinity |
| White balance | Auto (adjust in post) | 3500 K | 3200–4000 K custom |
| File format | RAW | RAW | RAW |
| Image stabilisation | Off (on tripod) | Off | Off |
Phone vs. Camera: Managing Your Expectations
Modern flagship phones — iPhone 15 Pro, iPhone 16 Pro, Samsung Galaxy S24 Ultra — can capture a green glow in the sky during a KP 3+ display, and the results are genuinely shareable. But there is a clear ceiling. Phone sensors are typically 1/1.7 inch or smaller, which means they collect far less light per pixel than a full-frame camera. At the same ISO a dedicated camera shows clean, detailed curtain structure; a phone shows a blotchy smear with obvious chroma noise.
The practical difference shows up most in two scenarios: faint or low-activity displays (KP 1–2) where a phone will register almost nothing useful, and fast-moving curtains where the phone's Night Mode exposure algorithm holds the shutter open too long and blurs the detail. For casual social posts and travel memory shots during a bright KP 3–5 display, a phone is absolutely adequate. For prints, portfolio work, or capturing the fine ray structure of a strong storm, a dedicated camera is not optional.
To get the best results from a phone, mount it on a mini-tripod or clamp, switch to the native Camera app's Night Mode, and drag the exposure time to its maximum (10–30 seconds depending on the model). Third-party apps such as NightCap Camera (iPhone) or Camera FV-5 (Android) allow manual ISO and shutter control, bringing results closer to a dedicated camera. Keep your phone in an inner pocket between shots — cold slows the processor and can cause the app to crash, losing your settings mid-shoot.
Top Photography Locations Near Tromsø (Under 25km)
Telegrafbukta, 5 km south of the city centre, is the most accessible starting point with a Bortle 4 rating, a dedicated car park, and rocky foreground elements that frame a moderate display well. It is reachable by taxi for €20–30 each way, making it the only near-city option viable without a rental car. Expect other photographers to be present on active nights — coordinate headlamp discipline so no one ruins each other's long exposures.
Ersfjordbotn sits roughly 20–25 km from the centre and rates Bortle 3. The steep fjord walls create a natural amphitheatre that frames the aurora above the water on calm nights, and reflections in the fjord can double the visual impact of a strong display. Parking is limited to a small pull-off; arrive before 21:00 on active nights to claim a spot. Check the where to see northern lights Tromso guide for additional coastal options on Kvaløya island.
| Location | Distance | Bortle Rating | Best Foreground | Without Rental Car? |
|---|---|---|---|---|
| Telegrafbukta | 5 km | 4 | Rocky beach, distant peaks | Yes — taxi viable (€20–30) |
| Breivikeidet ferry terminal | 8 km | 4–5 | Water, city glow | Yes — bus/taxi |
| Kvaløya Rv 862 roadside | 15 km | 3–4 | Mountain silhouettes | No |
| Grønnfjord bridge | 20 km | 3 | Fjord reflections | No |
| Ersfjordbotn | 25 km | 3 | Dramatic fjord amphitheatre | No |
Premium Dark Sky Spots for Professional Shoots (30-70km)
Ersfjorden (35 km northwest) is the step-up location most serious photographers choose first. Its Bortle 2–3 rating reveals faint KP 2 displays invisible near the city, and the 200-degree unobstructed northern horizon lets you capture full aurora arcs without cropping. Kattfjord, 30 km south and also Bortle 3, is a less-crowded alternative with a fjord-and-village foreground that adds human scale to wide compositions.
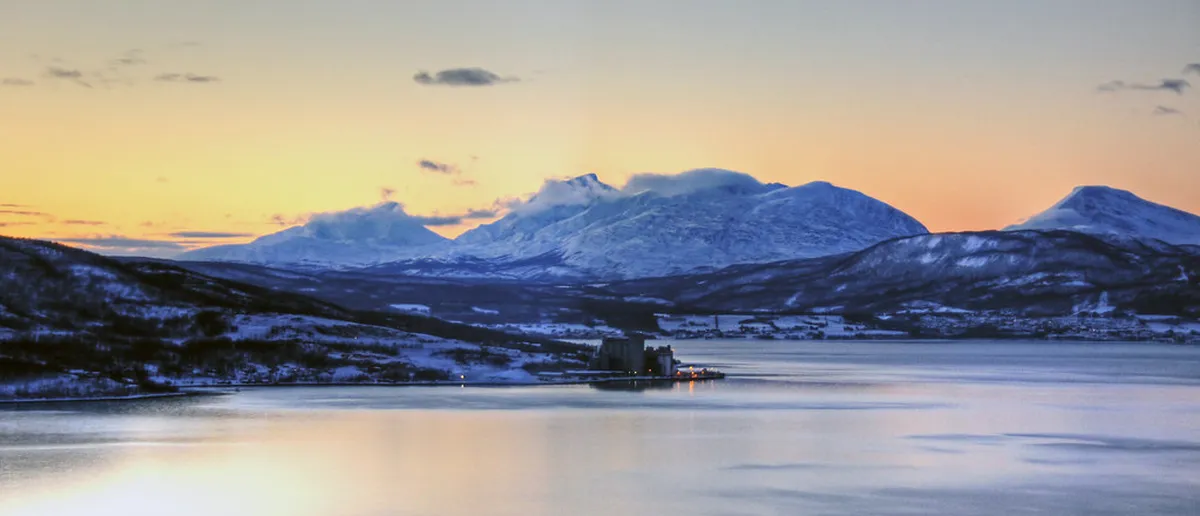
Grøtfjord (60 km northwest, Bortle 1–2) offers the darkest skies accessible by road in the Tromsø region. The trade-off is a 70-minute drive on roads that see less winter maintenance, limited cell signal, and genuine isolation if a vehicle problem arises. Sommarøy island (70 km west, Bortle 2) adds coastal Arctic scenery with white sand beaches that look surreal under green light, but the 85-minute drive and limited winter services make it a destination for experienced photographers with winter driving confidence.
| Location | Distance | Drive Time | Bortle Rating | Key Feature | Difficulty |
|---|---|---|---|---|---|
| Kattfjord | 30 km | 35 min | 3 | Fjord and village | Intermediate |
| Ersfjorden | 35 km | 40 min | 2–3 | 360° horizon, reflections | Intermediate |
| Grøtfjord | 60 km | 70 min | 1–2 | Darkest road-accessible skies | Advanced |
| Lyngen Alps viewpoints | 60 km E | 70 min | 2–3 | Dramatic mountain backdrop | Advanced (avalanche risk) |
| Sommarøy | 70 km | 85 min | 2 | Arctic coastal, white sand | Advanced |
| Skibotn | 90 km | 90 min | 2 | Clear when coast is clouded | Advanced |
Essential Apps for Aurora Forecasting and Location Finding
Hello Aurora is the most community-driven option, pulling real-time sighting reports from photographers across Northern Norway with local accuracy that generic global apps can't match. It includes hour-by-hour cloud coverage maps calibrated to Norwegian fjord microclimates, which is where global weather apps consistently underperform. The Aurora Forecast app by SpaceWeatherLive gives you the KP index, solar wind speed (Bz component), and a visual oval map — check the Bz value first; a negative Bz (southward-pointing) is what actually drives aurora activity, regardless of headline KP numbers.
Visit Yr.no, the standard local weather service used by Norwegian meteorologists, which is significantly more accurate than international apps for predicting cloud clearance over specific fjords and valleys. Use the Meteogram view to see hour-by-hour cloud base height — a cloud ceiling above 3000 m typically means you can still shoot stars. Light Pollution Map (lightpollutionmap.info) lets you overlay Bortle scale data on a satellite map so you can pinpoint dark pockets before you drive.
| App | Best For | Local Accuracy | Key Feature to Use |
|---|---|---|---|
| Hello Aurora | Real-time sighting reports | Excellent — Norway-specific | Community sightings + cloud map |
| Aurora Forecast (SpaceWeatherLive) | Solar wind monitoring | Good — global KP data | Bz component (negative = active) |
| Yr.no | Hourly cloud prediction | Excellent — Norwegian Met Office | Meteogram: cloud base height |
| Light Pollution Map | Finding dark spots by Bortle | Excellent — satellite data | Bortle overlay on road map |
| Windy | Wind speed at altitude | Good | Cloud layer cross-section view |
Download offline maps for your intended route before leaving Tromsø — cell coverage disappears in many of the remote valleys. A combination of Yr.no and Hello Aurora checked 2–3 hours before heading out gives you the most reliable picture of where the sky will be clear and how active the oval is likely to be.
Safety and Survival: Remote Photography in the Arctic
Temperatures can drop below –20°C while you wait for the lights to appear, and wind chill pushes the felt temperature significantly lower. Stationary photography — standing still for one to three hours — requires considerably warmer clothing than active hiking at the same air temperature. Refer to the tromso packing list winter for a full clothing breakdown, but the minimum is a wool base layer, insulated mid layer, and a –30°C-rated down parka with a windproof shell.
Frostbite can develop on exposed fingertips within minutes when you are repeatedly removing gloves to adjust dials. Touchscreen-compatible liner gloves worn under heavier mittens are the standard solution — you remove the outer mitten but keep the liner on. Chemical hand warmers placed inside the outer mitts extend your comfortable shooting window significantly. Never rest bare metal camera components against exposed skin.
Driving on unlit Arctic roads requires winter tires (mandatory by law in Norway from November to April) and experience with ice and packed snow. Keep an emergency kit in your car: thermal blanket, food and water, a shovel, tow rope, and a portable jump starter. Tell someone your planned location and expected return time before heading out. Never stop your car in the middle of a narrow mountain road to photograph — use designated pull-offs only.
Seasonal Access: How Winter Conditions Affect Your Shoot
Heavy snowfall can block access to smaller side roads and scenic viewpoints with no advance notice. Main roads on Tromsøya island and Rv 862 on Kvaløya are plowed reliably, but coastal winds create dangerous drifts on exposed sections. Always check Statens Vegvesen (vegvesen.no) for current road closures before heading to any location beyond 25 km. The tromso in winter season can flip road conditions from passable to closed within two hours.
Polar Night — roughly 26 November to 15 January in Tromsø — means the sun never rises, giving you effectively 24 hours of potential shooting darkness. This allows daytime scouting to be done in twilight conditions around midday, which is genuinely useful for identifying compositions and parking situations before committing to a night shoot. Outside polar night, use the two to three hours of low-angle twilight that precede a proper dark sky to scout locations while there is still some ambient light.
Battery performance degrades sharply below –15°C. A lithium-ion battery rated for 500 shots in moderate conditions may deliver only 150–200 in sustained sub-zero temperatures. Carry your spare batteries in a chest pocket against your body heat and swap them on a timer — do not wait until the camera dies, because a cold battery that reads 30% can drop to zero without warning. USB-C power banks also lose capacity in the cold; keep them in an inner pocket rather than a bag.
Common Aurora Photography Mistakes and How to Fix Them
Blurry stars are almost always a focus problem. Autofocus cannot acquire a target in near-total darkness and typically settles at a slightly wrong distance, producing images that look sharp on the camera's rear LCD but are soft when viewed at 100% on a monitor. Use live view at 10x magnification on the brightest star available, adjust the focus ring until the star is a hard point, then tape the ring. Review your first test shot at full zoom — if stars show a diffraction halo rather than a sharp spike, the focus is not at true infinity.
Grainy images with washed-out colour in the aurora curtain usually mean ISO is too high relative to what the scene requires. If you are shooting at ISO 6400 with a 20-second exposure and the sky is well-exposed, you have too much ISO — try ISO 3200 at 15 seconds or ISO 1600 at 8 seconds with a faster aperture. Checking the histogram after every adjustment is faster than guessing; a spike pushed hard to the right means overexposure, not optimal brightness.
Condensation is the mistake that ruins an entire night rather than just a single shot. Bringing a cold camera body or lens into a heated car causes instant condensation that can take 30 minutes to clear and can damage internal optics over repeated cycles. Place your camera in a sealed plastic zip bag before entering any warm space. Let the bag slowly warm to room temperature, then take the gear out. The same applies when returning to the cold — a warm lens will immediately frost if taken into freezing air without acclimatising.
Temperature shock is a photographer's silent killer. Always seal your camera and lenses in a plastic zip bag 10–15 minutes before moving between extreme temperature zones (outdoor –20°C to warm car +25°C). This allows the air inside the bag to equilibrate, preventing internal condensation on electronics and optics.
| Mistake | Symptom | Fix | How to Verify |
|---|---|---|---|
| Autofocus in dark | Blurry stars / soft aurora detail | Manual focus: 10x live view on a bright star, tape ring | Review at 100% zoom on camera LCD |
| Shutter speed too long | Star trails, smeared aurora curtain | Apply the 500 Rule; 10–15 sec at 14–24 mm | Check star sharpness at full zoom |
| ISO too high | Grain / chroma noise in sky | Open aperture wider instead of raising ISO | Histogram + 100% crop review |
| Shooting JPEG | Cannot recover highlights or colour | Switch to RAW in camera menu before you leave the hotel | Check file extension on card |
| Image stabilisation on (tripod) | Paradoxical vibration blur | Disable IS/OSS/VR in menu and on lens switch | Compare two otherwise identical shots |
| Condensation on lens | Soft hazy images, foggy front element | Seal in zip bag before entering warm spaces; use lens heater | Inspect front element with torch before each shot |
For related Tromsø planning, see our guides to 15 Essential Guides to the Northern Lights in Tromso and 17 Best Northern Lights Tours in Tromso.
For seasonal context, see Visit Norway’s official Tromsø guide.
Background: the city of Tromsø sits at 69°N, deep inside the Arctic Circle.
Frequently Asked Questions
What is the best lens for northern lights photography in Tromso?
A wide-angle lens with an aperture of f/2.8 or wider is ideal. This allows the camera to capture more light in a shorter time, which prevents the stars from trailing. You can find more gear tips in our northern lights Tromso guide.
Can I take photos of the aurora with an iPhone?
Yes, modern iPhones with Night Mode can capture the aurora quite well. Use a tripod to keep the phone steady for the long exposure. For the best results, use a third-party app that allows for manual control over shutter speed and ISO.
Do I need a professional guide for aurora photography?
While you can go alone, a guide knows the best dark sky spots and microclimates. They also provide technical assistance with your camera settings in the dark. Many photographers book a Book My Northern Lights Tour for the best experience.
How do I stop my camera from freezing?
Keep your camera in a bag when moving between different temperatures to prevent condensation. Use a lens heater to stop frost from building up on the glass. Always carry multiple spare batteries in your warm inner pockets to keep them functioning.
What is the Bortle scale for Tromso locations?
Tromsø city center is around a Bortle 5 or 6, which is quite bright. Nearby spots like Ersfjordbotn are Bortle 3, while Sommarøy can reach Bortle 2. Choosing a lower number on the scale ensures darker skies and more visible aurora details.
Photographing the northern lights in Tromsø is a bucket-list experience for many. Success comes to those who prepare for the cold and master their equipment. Remember to look up and enjoy the show with your own eyes occasionally. The Arctic sky offers a spectacle that no photograph can fully replicate.
Use these tips to ensure your memory card is full of vibrant green waves. Stay safe, stay warm, and respect the fragile Arctic environment during your shoot. Don't forget to check out the Arctic Cathedral and Tromsø Treasures walking tour while you are in town. Your journey into the polar night will surely be an unforgettable adventure.
You might also like
Continue reading
More guides you'll find useful